The LivePair rig — full parts list
Software isn't enough. LivePair runs on a physical rig: a second screen, a pad mount, a silent drive motor, and wireless control from your laptop. Everything below is either off the shelf or a printable STEP file we sell. Buy the parts, print the mounts, assemble in an afternoon.
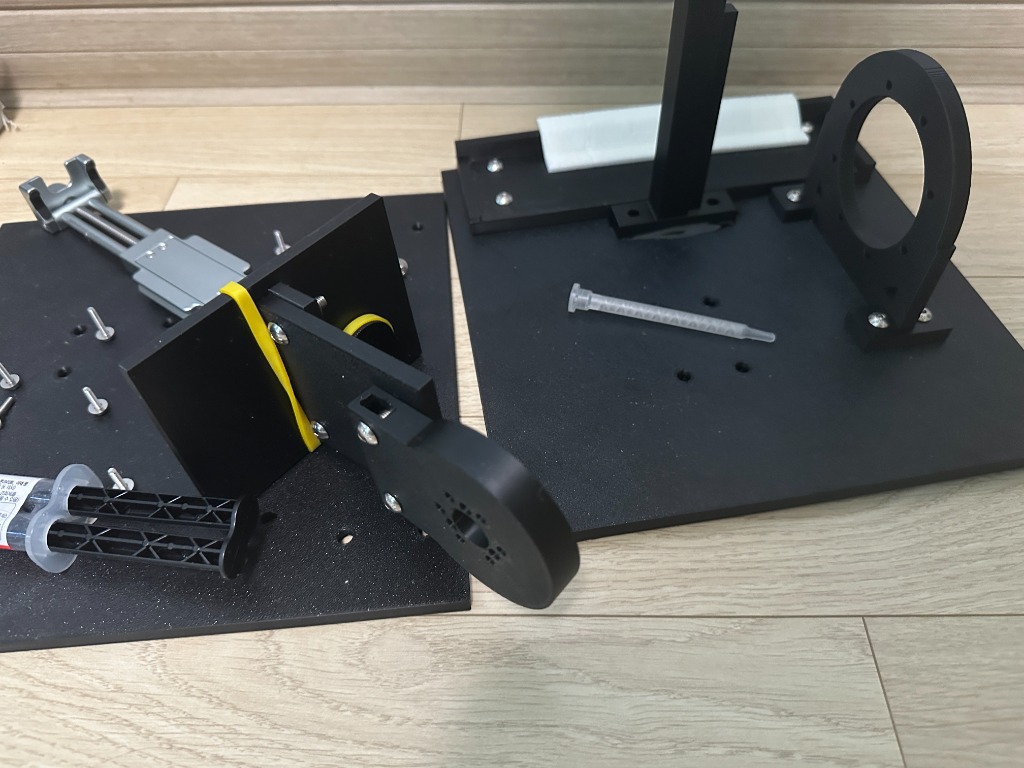
Custom mounts — STEP files
$10The custom mounts we designed for this rig — these parts connect the motor to the setup so it works as one piece. Buy once, import the STEP files into Bambu Studio, and print them on your own printer. Already purchased? Download here →
No 3D printer? Order the parts printed
Upload the STEP files to any print-on-demand service and the mounts arrive by mail. Ask for PETG or PLA+ with at least 30% infill — the motor mount carries load.
Bill of materials
Estimated street prices — links go straight to a search for the exact part. Most of this hardware (desk tools, connectors, fasteners) can be found cheaper on AliExpress; Amazon links are the fast-shipping option.
GIM6010-8 gear motor×1
~$90The drive that rotates the rig. BLDC with gearbox — dead silent even at crawl speed. Not a servo.
Orange Pi Pico 2W×1
~$15Wireless bridge — receives commands from your laptop over Wi-Fi and drives the motor.
1/4" camera mount nut×2
~$2Standard tripod thread — lets the clamp bite into the printed plate.
Wago lever connectors×5
~$5Tool-free splicing for the power leads — the orange levers in the wiring photo.
M3 button-head hex bolts — 12/16/20/25mm×1 set
~$8Fasten the printed parts, spacers, and brackets. Stainless.
DroidCam (software)×—
FreeFree app — turns your iPhone or Android into a wireless webcam the laptop can use.
Assembly
- 1Print the STEP-file parts — the custom mounts that connect the motor to the rig.
- 2Bolt the GIM6010-8 into its printed housing with M3 screws.
- 3Press the 1/4" camera nuts into the clamp plate and attach the Leofoto PC-120 — the pad clamps in here.
- 4Mount the 16" portable monitor on the VESA arm using the printed bracket.
- 5Stand the Orange Pi Pico 2W on the M3 hex spacers and wire it to the motor driver.
- 6Run the XT60 extension from the B6neo to the motor power input, splicing with Wago connectors.
- 7Plug the 65W USB-C PD charger into the pad and laptop side.
- 8Install DroidCam on your phone and PC — your phone is now the rig's webcam.
Power & wiring
B6neo → XT60 extension → GIM6010-8. The PD charger feeds the pad and laptop side. Keep the motor supply on its own line — don't share the USB rail.
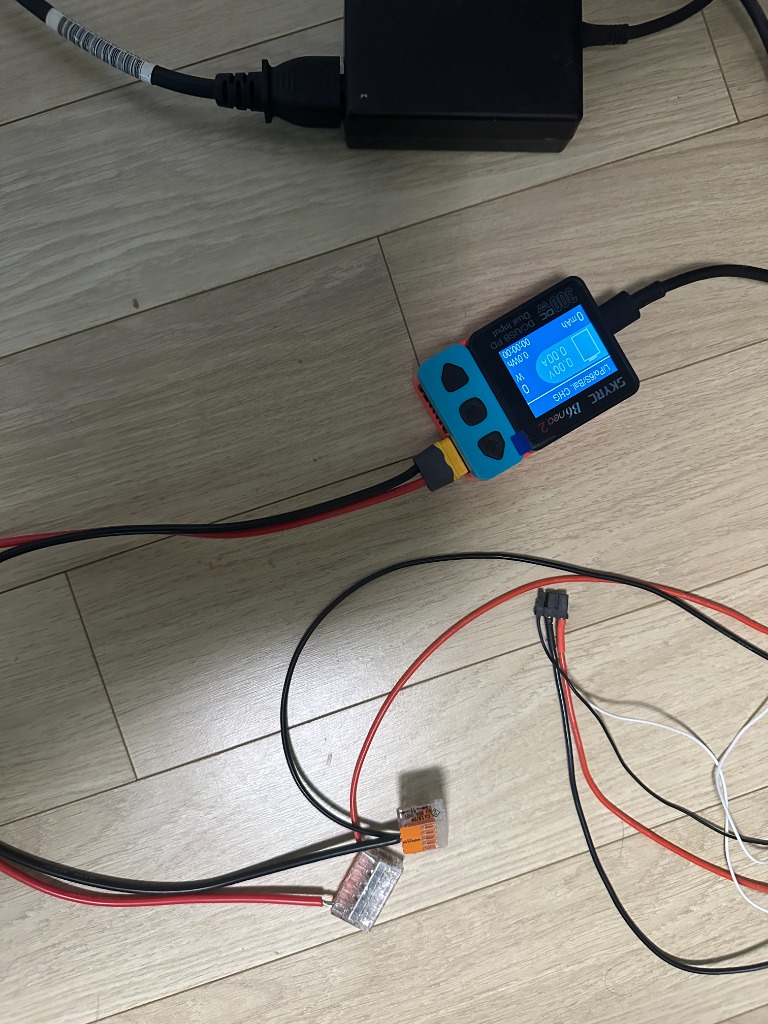
Motor power wiring
B6neo output → XT60 → GIM6010-8, spliced with Wago lever connectors on the power leads.
Never connect the gear motor directly to a battery.
Direct battery hookup can throw a spark on contact. Always feed the GIM6010-8 through the B6neo, and read its manual before connecting anything.
Wireless control
The Orange Pi Pico 2W joins your Wi-Fi and listens for commands from the LivePair app on your laptop — rotate, stop, reposition. No USB tether to the rig.
Setup guides
Step-by-step for every smart part. Read these once before you power anything on.
Orange Pi Pico 2W — first boot
- Download the Orange Pi OS / Armbian image for the Pico 2W from the official wiki (link below).
- Flash it to a microSD card with balenaEtcher or Raspberry Pi Imager.
- Boot the board, connect over USB-C or serial, and join it to your Wi-Fi (
nmtuion Armbian). - Note the board's IP — the LivePair app talks to it over Wi-Fi to drive the motor.
B6neo — powering the motor
- Read the SkyRC manual (below) — the B6neo is a DC smart charger, not a plug-in adapter.
- Feed the B6neo from a DC input or supported PD source per its spec sheet.
- Set the output profile for your motor supply voltage before connecting the XT60 lead.
- Only then connect the XT60 to the GIM6010-8 — never straight to a battery.
GIM6010-8 — configuration
- Grab the instruction manual and host tuning software from the SteadyWin page (below).
- Connect the driver over UART/CAN per the manual and set the motor ID and limits.
- Test at the lowest speed first — the gear reduction makes even crawl speed torquey.
Phone as webcam — DroidCam
- Install DroidCam on your iPhone (App Store) or Android (Play Store), and the PC client from dev47apps.com.
- Connect phone and laptop to the same Wi-Fi — or use USB.
- Open the app, copy the device IP into the PC client, hit Start.
- Select "DroidCam" as the camera inside LivePair.
Docs & manuals
Official documentation for every smart part in the rig.
GIM6010-8 — SteadyWin
Manufacturer's manual hub: instruction manuals, firmware, and the host tuning software. English manuals included.
B6neo — SkyRC manual (PDF)
Official instruction manual — read the warnings section before powering the motor.
Orange Pi — official wiki
Board docs, OS images, pinouts, and flashing guides for the Pico 2W / Zero 2W.
DroidCam
Downloads and setup guides for phone-as-webcam.